Essential Roof Maintenance Tips for Homeowners
Your home is likely your most significant financial investment, and sitting right at the top of it is its primary shield against the elements. A well-maintained roof protects your family, your belongings, and the structural integrity of your house from rain, snow, wind, and relentless sun. Yet, for many people, the roof remains out of sight and out of mind until a glaring issue—like a water stain on the bedroom ceiling or a puddle in the living room—demands immediate attention.
Proactive roof maintenance for homeowners is the secret to avoiding unexpected, wallet-draining disasters. By taking a few preventative steps, you can add years to the life of your roofing materials, improve your home’s energy efficiency, and enjoy true peace of mind regardless of the weather outside.
In this comprehensive guide, we will walk you through everything you need to know about caring for your roof. From understanding what to look for during an inspection to knowing when to call in the experts, this guide covers the actionable steps you need to keep a strong, healthy roof over your head.
The Fundamentals of Roof Inspections
The cornerstone of any good maintenance routine is observation. You cannot fix a problem you do not know exists. But how do you go about checking a structure you rarely interact with?
How Often Should a Roof Be Inspected?
A common question among property owners is exactly how often should a roof be inspected? Industry experts generally recommend a thorough inspection at least twice a year. The optimal times for these check-ups are during the mild weather of spring and autumn.
A spring inspection allows you to assess and repair any damage caused by brutal winter storms, ice, and freezing temperatures. Conversely, an autumn inspection ensures your home is fully prepared to handle the upcoming winter snow and heavy rains. In addition to these biannual checks, you should always perform a brief visual inspection following any major severe weather event.
Professional Roof Inspection vs DIY
When it comes to actually getting up on the ladder, you have a choice to make: professional roof inspection vs DIY.
The DIY Route: For the average homeowner, a DIY inspection should primarily be visual and ground-based. Using a good pair of binoculars, you can scan your roof from the yard, looking for obvious signs of wear, sagging, or missing materials. You can also safely check the interior of your attic. If you have a single-story home with a low-slope roof, you might feel comfortable safely using a ladder to clean your gutters and look closer at the edges.
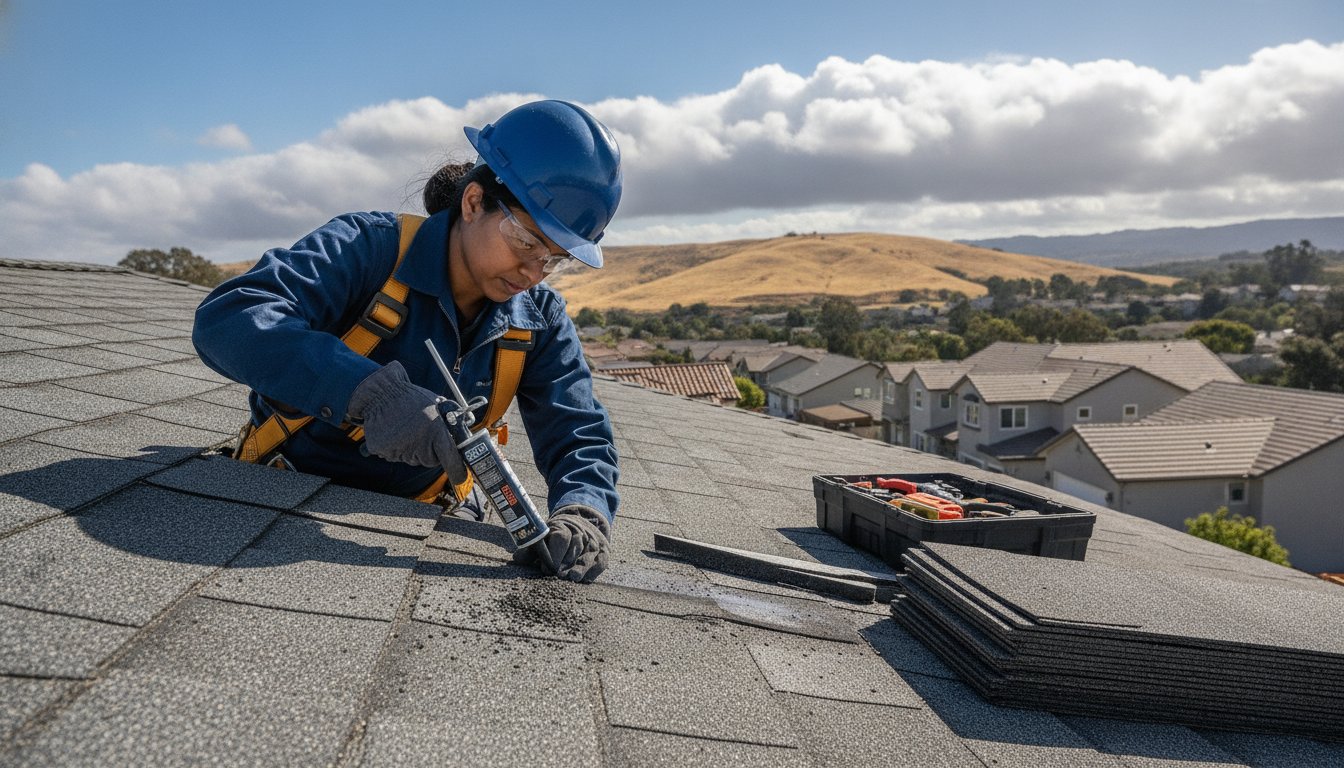
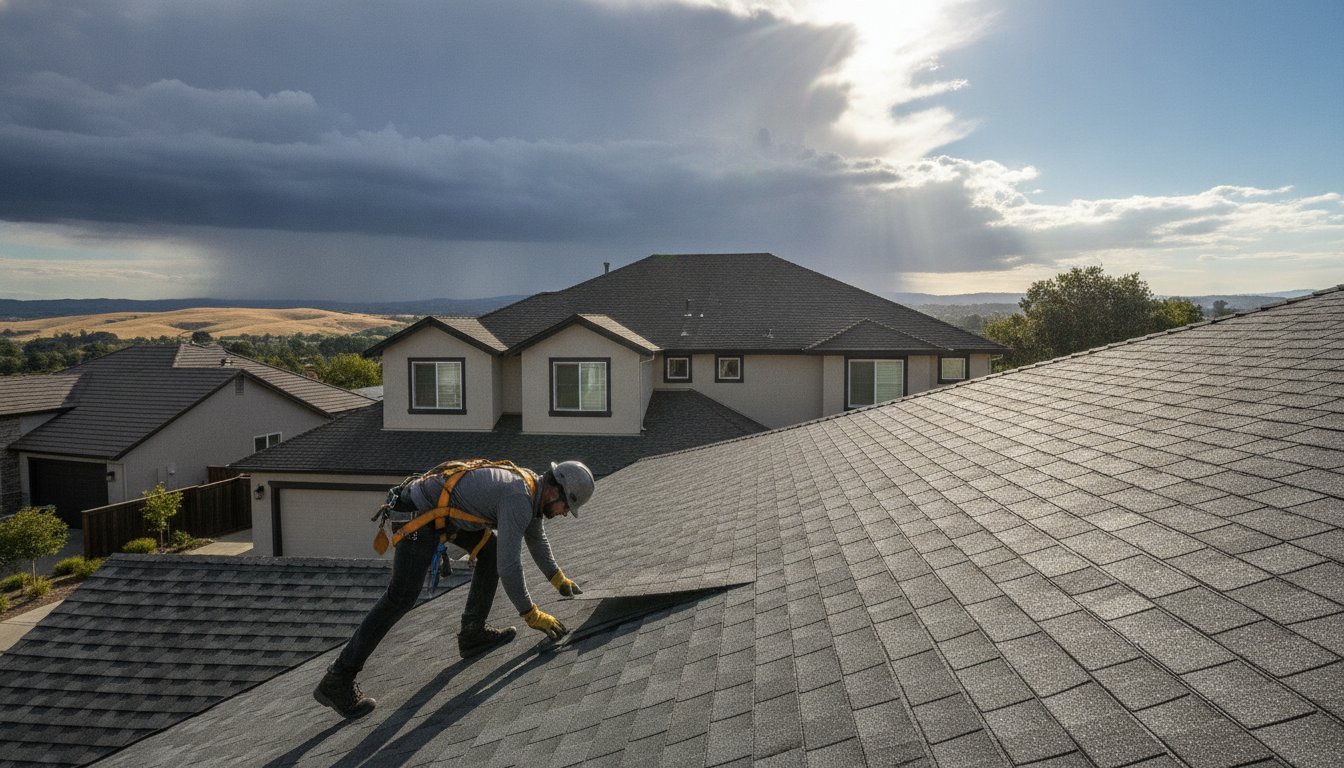
The Professional Route: Safety should always be your top priority. Walking on a roof can be incredibly dangerous, especially if it is steep, wet, or made of fragile materials like clay tiles or slate. A professional roofer has the necessary safety equipment, harnesses, and training to navigate the surface without causing damage or risking a fall. Furthermore, an expert eye can spot subtle issues—such as hairline cracks in pipe boots or minor granule loss—that an untrained observer would easily miss.
As a best practice, conduct your own visual inspections from the ground or a secure ladder a few times a year, but hire a certified roofing contractor to perform a comprehensive, on-the-roof evaluation every two to three years.
Building Your Seasonal Roof Inspection Checklist
To keep your maintenance routine organized and effective, it helps to have a system. Using a seasonal roof inspection checklist ensures you never miss a critical component. Here is what you should be evaluating during your biannual reviews:
Exterior Checklist
- Shingle Condition: Look for curling, buckling, blistering, or entirely missing shingles.
- Granule Loss: Check your gutters and downspouts for excessive asphalt granules, which look like coarse black sand.
- Flashing: Inspect the metal strips around chimneys, skylights, and vent pipes for rust, lifting, or broken seals.
- Gutters and Downspouts: Ensure they are securely attached, pitched correctly, and free of debris.
- Roof Valleys: Check the areas where two roof slopes meet. These valleys are high-water-traffic zones and must be clear of obstructions.
- Overhanging Branches: Look for tree limbs that are touching or hanging dangerously close to the roof surface.
- Fascia and Soffits: Inspect the wooden boards along the roofline for signs of rot, peeling paint, or pest infestations.
Interior Checklist (The Attic)
- Signs of Moisture: Look for damp insulation, dark water stains on the wood, or the presence of mold and mildew.
- Light Penetration: Turn off your flashlight and look for daylight peeking through the roof boards.
- Ventilation Check: Ensure that soffit vents and ridge vents are not blocked by insulation or debris.
The Critical Link Between Attic Ventilation and Roof Health
When discussing roof maintenance, the focus usually stays on the exterior. However, what is happening underneath your roof is just as important. There is a direct, undeniable link between attic ventilation and roof health.
Your attic needs to breathe. A properly ventilated attic relies on a system of intake vents (usually located under the eaves in the soffits) and exhaust vents (located near or at the roof ridge). This system allows cool, fresh air to enter at the bottom and hot, moist air to escape at the top.
Without proper ventilation, two destructive things happen:
- Summer Heat Build-Up: In the summer, an unventilated attic can reach temperatures exceeding 150 degrees Fahrenheit. This intense, trapped heat literally bakes your shingles from the inside out, causing the asphalt to dry, crack, and blister prematurely.
- Winter Moisture Accumulation: In the winter, warm, moist air from your living spaces (generated by cooking, showering, and heating) rises into the cold attic. Without ventilation, this moisture condenses on the cold underside of the roof deck. Over time, this condensation leads to wood rot, mold growth, and deteriorating insulation.
By ensuring your attic insulation is not blocking your intake vents and verifying that your exhaust vents are clear, you are actively protecting the structural integrity of your entire home.
Locating the Source of the Problem: Leak Detection
Water is a relentless enemy. It will exploit the tiniest vulnerability in your home’s exterior. One of the most frustrating aspects of home maintenance is identifying roof leak sources. Because water can travel along rafters, trusses, and the underside of the roof decking before finally dripping onto your ceiling, the visible water stain in your hallway is rarely directly underneath the actual hole in the roof.
To track down a leak:
- Start in the Attic: Go up during a rainstorm (or have a helper spray the roof with a garden hose) and bring a bright flashlight.
- Follow the Trail: Look for active dripping, but also look for water tracks, black marks, or water stains on the wood. Follow these marks UP the slope of the roof to their highest point.
- Check the Penetrations: The vast majority of leaks occur where the roof is interrupted. Closely examine the areas around plumbing vents, chimney structures, attic fans, and skylights.
- Measure and Transfer: Once you find the source in the attic, measure its distance from a fixed point (like a chimney or a specific exterior wall). Transfer this measurement to the outside of the roof to locate the exact area that needs a roof repair.
Exterior Upkeep: Shingles, Flashing, and Valleys
Taking care of the actual roofing materials is the most visible part of your maintenance routine. Proper care here is vital for extending asphalt shingle lifespan. Asphalt shingles are the most common roofing material due to their affordability and durability, but they are not invincible.
Extending Asphalt Shingle Lifespan
To get the maximum 20 to 30 years out of your asphalt shingles, you need to protect their protective granule coating. These granules shield the asphalt from destructive UV rays. Avoid walking on your roof unnecessarily, as foot traffic dislodges these granules. Furthermore, keep tree branches trimmed back at least ten feet from your home. When branches sway in the wind, they can scrape across the shingles, acting like heavy-grit sandpaper and stripping the granules away.
Clearing Debris from Valley Flashing
The valleys of your roof—the V-shaped intersections where two sloping roofs meet—channel vast amounts of water down into your gutters. Because of their shape, valleys are notorious for collecting fallen leaves, pine needles, and twigs.
Clearing debris from valley flashing is a non-negotiable maintenance task. When debris piles up in a valley, it creates a dam. Rainwater gets trapped behind this dam, pools up, and eventually backs up underneath the shingles. Furthermore, decaying leaves hold moisture against the roofing materials, accelerating rot and deterioration. Use a soft-bristled broom or a leaf blower to gently clear these critical waterways every autumn.
Repairing Damaged Roof Flashing
Flashing refers to the thin pieces of galvanized steel, aluminum, or copper used to direct water away from critical areas of the roof, such as intersections and penetrations. Because flashing is made of metal and is subjected to constant temperature fluctuations, it expands and contracts, which can eventually break its watertight seal.
Repairing damaged roof flashing early is one of the most effective ways to prevent major indoor water damage. If you notice that the caulk or roofing cement around a pipe boot or chimney has cracked or dried out, you can often scrape away the old sealant and apply a fresh bead of high-quality polyurethane roofing sealant. However, if the metal flashing itself is rusted through, severely bent, or entirely detached, it will need to be completely replaced by a professional to ensure the area remains watertight.
Keeping the Roof Clean: Fighting Moss and Algae
Depending on your local climate, particularly if you live in a humid or heavily wooded area, you might notice green, fuzzy patches or dark black streaks appearing on your roof.
The dark black streaks are usually caused by Gloeocapsa magma, a type of algae that feeds on the limestone filler used in modern asphalt shingles. While mostly an aesthetic issue, severe algae can darken your roof, causing it to absorb more heat and raising your cooling bills.
Moss, on the other hand, is a serious threat. Moss has shallow roots that anchor into the shingles. As it grows, it lifts the edges of the shingles, allowing wind and water to penetrate underneath. Furthermore, moss acts like a sponge, holding moisture against the roof surface long after a rainstorm has passed.
Cleaning Moss Off Roof Shingles
When cleaning moss off roof shingles, you must proceed with extreme caution to avoid damaging the roof further. Never use a pressure washer on an asphalt shingle roof. The high-pressure water will instantly blast away the protective granules, ruining the shingles and voiding your warranty.
Instead, use a soft-bristle brush to gently sweep away loose moss, always brushing in a downward motion to avoid lifting the shingle edges.
Best Roof Cleaning Solutions
For stubborn moss and algae, you will need to apply a chemical treatment. The best roof cleaning solutions are generally oxygen bleach-based (sodium percarbonate) rather than chlorine bleach. Chlorine bleach is highly toxic to the environment, will kill your foundation plants if it runs off the roof, and can corrode metal gutters and flashing.
You can mix a solution of warm water and oxygen bleach, spray it onto the affected areas using a pump sprayer, let it sit for 15 to 20 minutes, and then rinse it away gently with a standard garden hose. Alternatively, you can install strips of zinc or copper flashing near the ridge of your roof. When it rains, trace amounts of these metals wash down the roof, naturally killing moss and algae and preventing future growth.
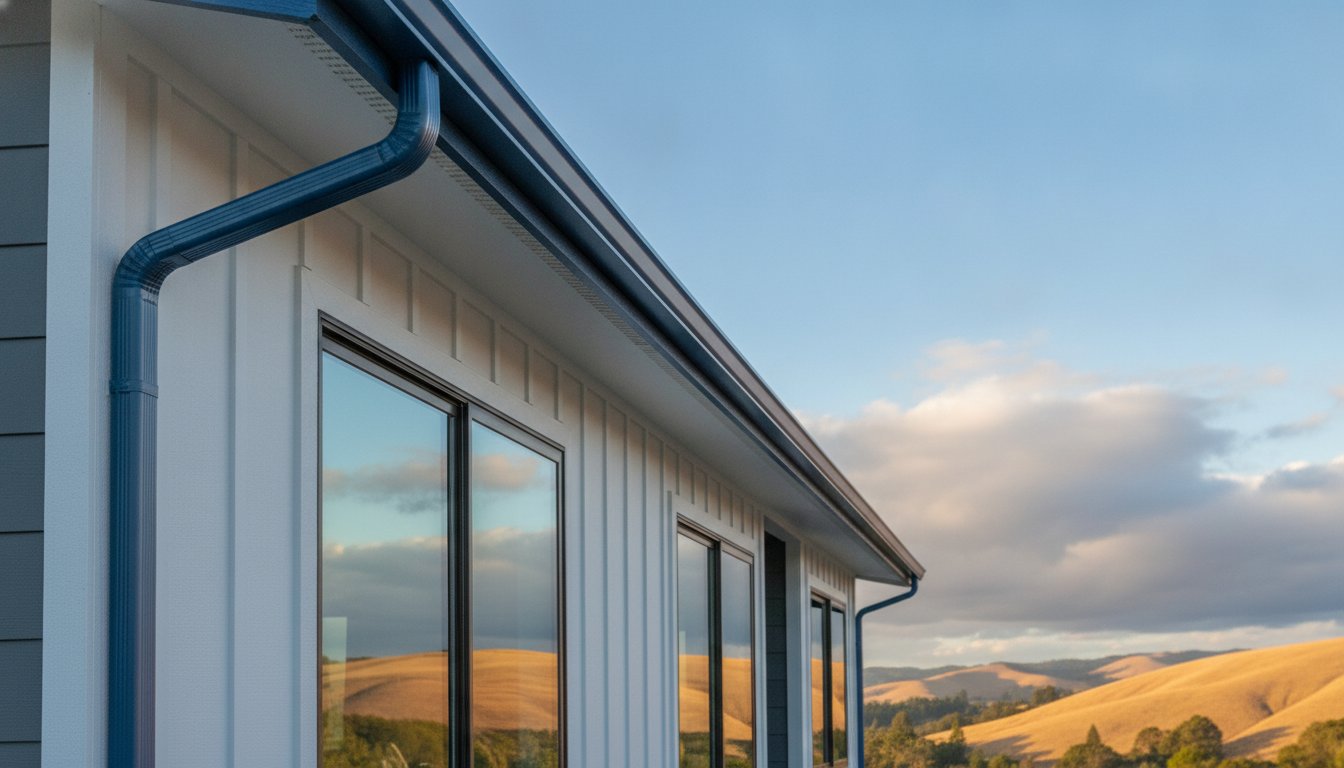
Gutters and Drainage: The Unsung Heroes
Your roof is only as effective as the drainage system attached to it. Gutters and downspouts are designed to catch the thousands of gallons of water that sheet off your roof during a storm and channel it safely away from your home’s foundation.
Impact of Clogged Gutters on Shingles
Most homeowners know that clogged gutters can lead to flooded basements and cracked foundations, but fewer realize the direct impact of clogged gutters on shingles and the roofline.
When a gutter is stuffed with leaves and debris, rainwater has nowhere to go. It fills the gutter to the brim and begins to overflow. However, it doesn’t just overflow onto the ground; it also backs up onto the roof. Through a process called capillary action, this standing water is wicked upward, traveling underneath the first few courses of shingles. This inevitably rots the wooden fascia boards holding the gutters up and destroys the edge of your roof decking. Keeping your gutters immaculately clean is a direct investment in your roof’s longevity.
Preventing Ice Dams on Gutters
If you live in a cold climate, winter brings a unique and highly destructive threat: ice dams. An ice dam is a ridge of solid ice that forms at the edge of a roof (often over the gutters) and prevents melting snow from draining off. As the snow higher up on the roof melts, the water runs down, hits the ice dam, and backs up under the shingles, causing massive leaks into the home’s exterior walls and ceilings.
Preventing ice dams on gutters requires a two-pronged approach. First, address the root cause, which is usually poor attic insulation and ventilation. If your attic is too warm, it melts the snow on the higher parts of the roof, while the overhangs (which are not above the warm house) remain freezing cold, causing the run-off to refreeze at the edge. By improving attic insulation and airflow, you keep the entire roof deck a consistent, cold temperature. Second, keep your gutters completely clear of autumn leaves before the first freeze. If gutters are already clogged when winter hits, they will immediately freeze solid, providing a foundation for an ice dam to build upon rapidly. In extreme cases, installing heated cables (heat tape) along the roof edge and inside the gutters can help maintain a clear channel for melting snow to escape.
Maintaining Flat Roof Drainage
If your home features a flat roof, your maintenance priorities shift slightly. Because flat roofs lack the steep pitch that naturally sheds water, maintaining flat roof drainage is absolutely critical.
Flat roofs rely on subtle slopes pointing toward scuppers (openings in the parapet walls) or internal drains to remove water. If leaves, plastic bags, or debris block these drains, water will accumulate rapidly. This creates “ponding water.” If water sits on a flat roof for more than 48 hours, it accelerates the breakdown of the roofing membrane and adds immense, dangerous weight to the structure of the house. Homeowners with flat roofs should clear away debris from drains and scuppers much more frequently—ideally after every single major wind or rainstorm.
Weathering the Storms: Dealing with Extreme Weather
Even with the best preventative care, Mother Nature can still deal a devastating blow. High winds, torrential downpours, and hail can cause sudden, acute damage that requires immediate attention.
Signs of Roof Damage After Storm
After severe weather passes, step outside and conduct a visual assessment. The signs of roof damage after storm activity can range from obvious to subtle:
- Missing or Torn Shingles: High winds can easily catch the edges of older, brittle shingles and rip them entirely off the roof deck.
- Hail Bruises: Hail damage doesn’t always look like shattered shingles. Often, it looks like small, dark, circular dimples or “bruises” where the hail impact has knocked away a cluster of granules, exposing the underlying asphalt.
- Debris Impact: Look for dents or punctures caused by falling tree limbs.
- Fallen Metal: Check your yard for pieces of aluminum flashing or lengths of gutter that may have been torn loose.
- Indoor Leaks: Naturally, any new water stains on your ceiling immediately following a storm indicate a breach in the roof.
Roof Repair vs. Roof Replacement
When you discover storm damage or general age-related deterioration, you face a critical decision: should you opt for a targeted roof repair or a full roof replacement?
If your roof is relatively young (under 10-15 years old) and the damage is localized—such as a single branch puncturing the decking or a few missing shingles from a wind gust—a repair is usually the most cost-effective and logical choice. A skilled roofer can blend new shingles into the existing roof, restoring its integrity.
However, if your roof is nearing the end of its expected lifespan (20+ years for standard asphalt), fixing one leak might just be a temporary band-aid before the next leak springs. Signs that it is time for a full roof replacement include widespread granule loss (where the roof looks “bald”), widespread shingle curling or cupping, or a roof deck that feels soft and spongy to walk on. Pouring money into constant, unending repairs on a failing roof is a losing financial battle.
The Economics of Roof Care: Budgeting and ROI
Taking care of a home is expensive, and it is easy to put off maintenance tasks that do not seem urgent. However, neglecting your roof is one of the most costly mistakes a homeowner can make.
Cost of Annual Roof Upkeep
When budgeting for home maintenance, you should factor in the cost of annual roof upkeep. This budget might include paying a local service to clean your gutters twice a year, buying roof cleaning solutions to tackle a minor moss problem, replacing a few tubes of roofing sealant, or occasionally paying a professional to replace a damaged pipe boot.
On average, a homeowner might spend anywhere from $200 to $600 a year on these minor maintenance tasks and inspections.
Compare this minor annual cost to the consequences of neglect. A small, unaddressed leak around a chimney can slowly rot the roof decking, destroy the attic insulation, ruin the drywall on your ceiling, and foster toxic black mold. What could have been a $150 flashing repair suddenly escalates into thousands of dollars in interior water damage restoration.
Furthermore, consider the ultimate expense: the roof itself. A full roof replacement for an average-sized single-family home can easily cost between $8,000 and $15,000, and significantly more for premium materials like metal or slate. By investing a small amount of time and money into routine maintenance, you can delay that massive capital expense by five, ten, or even fifteen years. The return on investment for proactive roof maintenance is undeniably high.
Conclusion
Your roof is a complex, hard-working system designed to protect everything you hold dear. It quietly endures freezing winters, scorching summers, and torrential storms, asking for very little in return.
By taking ownership of your home’s exterior health—utilizing a seasonal checklist, understanding the importance of attic ventilation, keeping your drainage systems clear, and knowing when to call in the professionals—you ensure that your roof remains strong and reliable.
Roof maintenance for homeowners does not have to be a daunting task. It simply requires consistency, observation, and a willingness to address small issues before they evolve into major catastrophes. Commit to looking up, staying proactive, and protecting your investment; your home (and your wallet) will thank you for decades to come.