A common planning benchmark is to set aside 5% to 10% of your home’s value for landscaping, but the right budget depends on what you plan to install and the conditions of your property. Budgeting for landscape installation starts with defining the project clearly, then matching its priorities to the funds available.
It’s understandable to want a firm number before deciding on plants, paths, or outdoor living features. But two yards of similar size can have very different needs: grading, drainage, soil, access, and material choices all affect the work. A realistic estimate reflects those conditions rather than relying on a single rule of thumb.
This guide explains how to build an estimate, separate essentials from features you can add later, and allow for surprises below the surface. You’ll also learn how to plan the layout, hardscape, infrastructure, and planting together, so phasing the work doesn’t cause avoidable rework. With a clear scope and a practical reserve for site unknowns, you can make informed decisions and shape a landscape plan around your priorities.
Key Takeaways
- Build your estimate around the actual scope and site conditions, not a single rule of thumb.
- Address drainage and other foundational needs before committing funds to decorative features.
- Set a complete landscape plan first, then phase installation to match your budget and priorities.
- Reserve part of your budget for unexpected site conditions that may emerge during construction.
- Coordinate layout, hardscape, infrastructure, and planting decisions to reduce costly rework.
How Much Does a Landscape Install Really Cost?
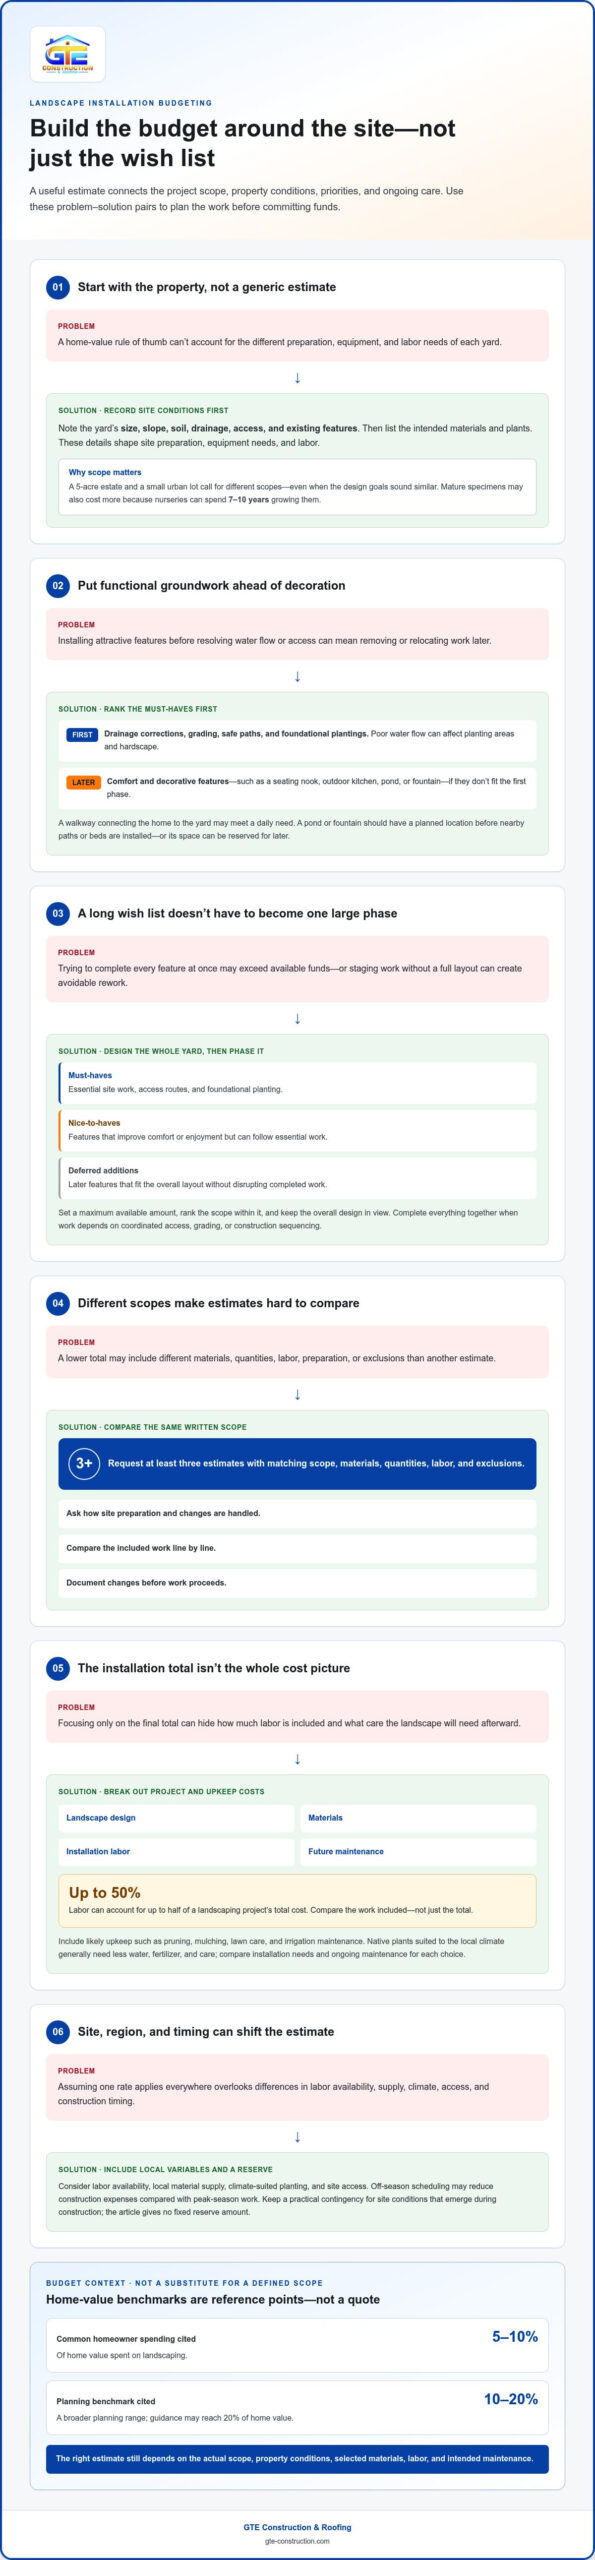
Build your estimate around the property’s conditions, design choices, labor, materials, and ongoing care. A home-value benchmark can provide context, but it can’t replace a defined project scope.
Identify Installation Cost Factors
Start by recording the yard’s size, slope, soil, drainage, access, and existing features. These conditions affect preparation, equipment needs, and the amount of labor required. Then list the intended materials and plants, since mature specimens can cost more because nurseries may spend 7-10 years growing them. A 5-acre estate and a small urban lot require different scopes, even when the design goals sound similar.
Break Down Project Expenses
Separate the estimate into landscape design, materials, installation labor, and future maintenance. Labor can account for up to 50% of a landscaping project’s total cost, so compare the work included, not just the final total. Add likely upkeep, such as pruning, mulching, lawn care, and irrigation maintenance.
Compare Estimates and Cost Variables
Request at least three estimates with matching scopes, materials, quantities, labor, and exclusions. Ask each landscaping company to explain how site preparation and changes are handled. Comparing the same written scope line by line makes estimates meaningful and helps prevent overruns. Document any changes before work proceeds.
Regional and seasonal conditions also affect estimates. Labor availability, local material supply, climate-suited planting choices, and site access can vary across San Francisco, Sacramento, Alameda County, and Contra Costa County. Off-season scheduling may reduce construction expenses compared with peak-season work. Include these factors in your comparison instead of assuming one national rate applies.
Use the figures as context, not a substitute for a plan: homeowners commonly spend 5% to 10% of home value on landscaping, while broader planning guidance may reach 20%. A successful estimate connects that benchmark to the property, selected materials, and intended maintenance.
Prioritizing must-haves, nice-to-haves, and deferred features
Rank landscape features by function, long-term value, and how they affect other work. A complete plan can guide installation in phases when completing everything at once doesn’t fit your budget.
Phasing works best when you plan the full layout upfront and complete essential work first. Doing everything together can make sense when work depends on coordinated access, grading, or construction sequencing.
- List functional must-haves first. Identify drainage corrections, grading, safe paths, and foundational plantings before choosing decorative upgrades. Poor water flow can affect planting areas and hardscape. Including these needs in the plan helps prevent installing features that later have to be removed or relocated.
- Separate immediate use from future enjoyment. Sort features into must-haves, nice-to-haves, and deferred additions. A walkway connecting the home to the yard may serve a daily need; a seating nook or outdoor kitchen could come later. This ranking gives each estimate a clear scope and helps you decide what to retain if your available budget changes.
- Choose plants and surfaces for upkeep as well as appearance. Native plants suited to the local climate generally need less water, fertilizer, and care. Drought-tolerant plants, permeable pavers, and synthetic turf can also reduce maintenance costs. Compare installation needs and ongoing care instead of choosing materials by appearance alone.
- Phase connected work in the right order. Establish the overall design before buying plants or installing hardscape, then sequence construction around drainage, grading, and infrastructure. A plan helps preserve the layout while moving selected features to later phases.
- Decide whether a water feature belongs in the first phase. Consider its location, how it connects to the surrounding layout, and the care it will require. A pond or fountain may compete with essential planting or circulation for current funds. If it’s a priority, include its location in the full plan before installing nearby paths or beds. Otherwise, reserve the space for a later addition.
For a cohesive layout that supports phased decisions, explore landscape design planning as you organize your priorities.
What Is A Realistic Landscaping Budget?
A realistic budget starts with a defined scope, then weighs priorities against available funds. A planning benchmark places landscaping at 10% to 20% of a home’s value.
Define Scope and Priorities
Write down the work you want completed, then sort each item by purpose. Separate essential site work from comfort features and decorative details. For example, list drainage corrections and access routes before an outdoor seating area. This order clarifies which expenses support the project’s function and which can wait.
Record the areas involved, desired materials, and features in one scope. Note whether the plan includes planting, paths, lawn changes, or a patio. A realistic scope also identifies work that depends on earlier steps. Don’t estimate a full-yard transformation from one attractive feature: each addition changes materials, labor, and the project sequence.
Set a maximum amount you can allocate, then rank priorities within it. If the complete wish list exceeds that limit, identify features you can defer without disrupting essential work. This helps you create a usable first phase while keeping later additions consistent with the intended design.
Build the Project Budget
Divide the budget into clear categories before making design decisions. List design, site preparation, materials, installation, and future maintenance separately. A written breakdown makes it easier to see which choices drive expenses and how scope changes affect the total. Record assumptions, such as the selected surface or planting area.
Use the home-value benchmark as context, not an automatic spending target. A property’s size alone doesn’t determine what its landscape needs. Compare your intended scope with available funds, then adjust materials, quantities, or timing to align the plan with your budget.
For an accurate comparison, request at least three quotes based on the same scope. Check what each includes, such as preparation, specified materials, installation tasks, and cleanup. If an estimate omits an item, record it separately rather than treating the lower total as directly comparable. Clear categories make revisions easier to track.
Review Budget Ranges
Use a percentage benchmark to establish a planning range, then test it against actual project priorities. Guidance recommends allocating 10% to 20% of a home’s value for landscaping. The useful amount within that range depends on the scope, site conditions, and features you intend to install.
Turn the estimate into a practical sequence. First identify the work needed for a complete, functional layout. Then determine which additions can move to a later phase without requiring removal or reinstallation. This lets you compare a focused initial project with the full vision, rather than treating every desired feature as equally urgent.
Review the plan whenever a material or feature changes. Treat the example as an illustration of scope, not a universal quote. Your estimate should reflect the selected work and property conditions.
Allowing a contingency for site unknowns
Include a contingency of 10-20% in a landscape renovation budget, adjusting it to site complexity. Hidden costs can include unexpected soil, drainage, grading, or access work discovered during preparation.
Identify Potential Hidden Costs
Walk the property and note conditions that could change the planned work. Check slopes, drainage patterns, compacted soil, narrow access routes, and existing structures near proposed planting beds. A low area that holds water, for example, may need grading or drainage adjustments before plants or hardscape go in. A professional site evaluation can help identify soil type, drainage needs, and other cost challenges before construction begins.
Use those observations to make the project scope more precise. Mark where paths, patios, planting areas, and water movement meet, because changes in one location can affect adjacent elements. Consider whether existing materials or vegetation need removal. Include custom features, such as built-in seating, in the plan from the outset. Adding them after installation begins can change labor and material requirements.
Ask for the estimate to separate visible work from allowances for conditions that may emerge during excavation. This gives you a clearer basis for comparing estimates and recording changes. If a crew discovers an obstruction or unsuitable soil, document the affected area, proposed solution, and revised scope before proceeding. A written record helps distinguish necessary site work from optional upgrades.
Set Aside Contingency Funds
Calculate the contingency against the project budget, using 10-20% according to the site’s complexity. A relatively straightforward planting area and a sloped yard with drainage concerns present different levels of uncertainty. Keep this reserve separate from the money assigned to planned features, so a surprise below ground doesn’t immediately displace an essential project element.
Define how the reserve can be used before construction starts. Prioritize discoveries that affect drainage, grading, safe access, or the durability of installed work. Don’t use contingency funds for a discretionary fountain or upgraded pavers while site conditions remain unresolved. This keeps the reserve focused on the project’s function and long-term performance.
Track each use against the original estimate. Record the reason for the change, the work affected, and the reserve remaining. If site conditions use part of the contingency, reassess deferred features before approving more spending. For example, postpone a decorative border rather than reducing necessary drainage work. Choosing sustainable plants suited to local conditions can also help align future care with project priorities.
Budgeting by layout, hardscape, infrastructure, and planting
Divide the plan into connected areas, then assign funds according to function and sequence. Keep the complete layout in view, even if installation happens in phases.
Allocate Funds Across Project Areas
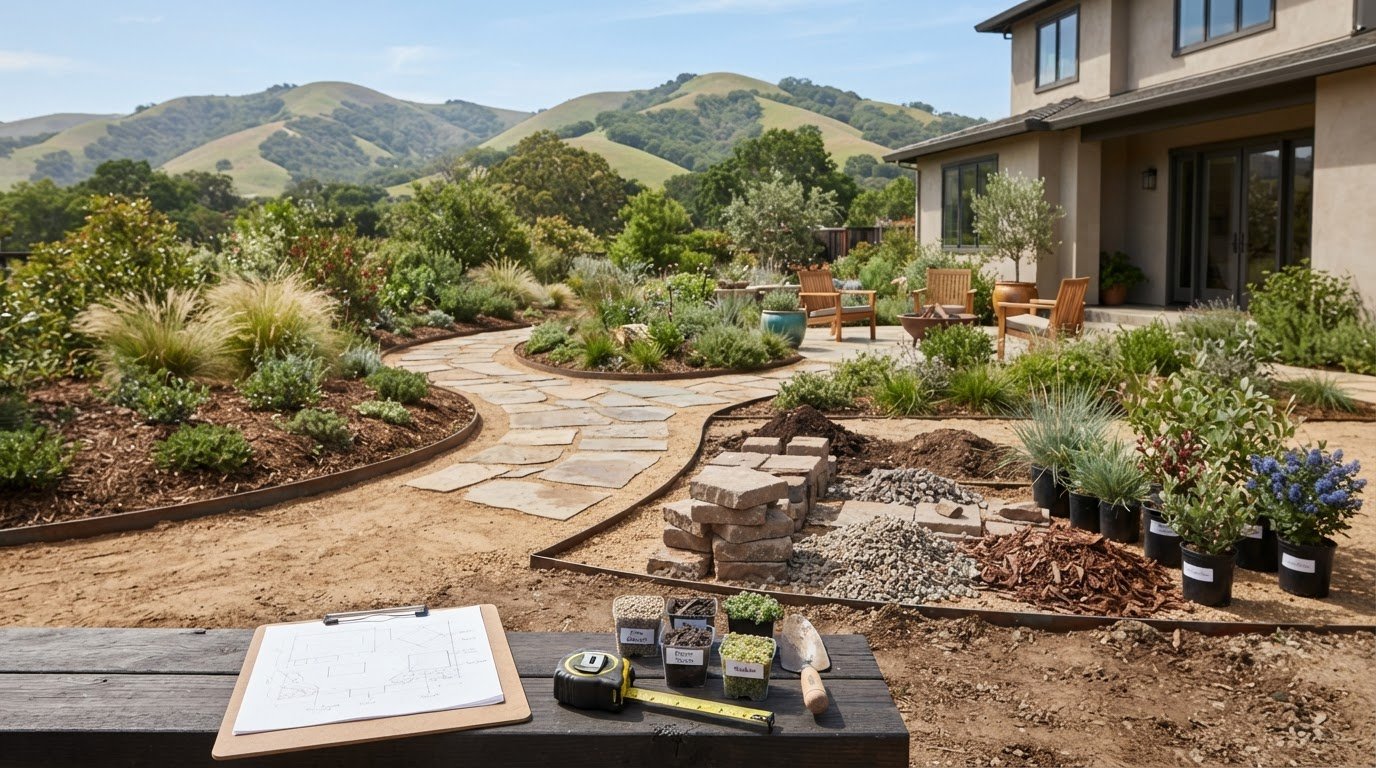
Start with a scaled layout showing paths, planting beds, patios, drainage, irrigation, and lighting. Mark how each area connects before assigning funds. The route of an irrigation line, for example, can affect where paving or planting should go. Treat the plan as one system, not a set of separate purchases.
Next, group expenses by layout, hardscape, infrastructure, and planting. Include grading and drainage with the site’s functional work rather than leaving them until after decorative choices. A patio, path, and garden bed may share edges or access routes. Coordinating these elements helps avoid paying for changes that could have been planned together.
Simplify Materials and Planting
Choose a restrained palette of materials before requesting estimates. Repeating one paving material across a path and patio can simplify the design, while multiple finishes may add transitions and details. Compare options by durability, appearance, and maintenance needs. Keep the intended layout stable while adjusting material selections to fit your budget.
For planting, group plants with similar light and water needs. This makes bed planning clearer and can help align irrigation with the planting design. Avoid adding individual features before deciding how they fit the whole yard. For example, settle the patio footprint before defining the adjacent bed, so the planting area reflects the final hardscape.
Choose Low-Maintenance and Native Plants
Prioritize native plants suited to the local climate. They generally require less water, fertilizer, and care, which can reduce maintenance demands over time. Match selections to their growing conditions, such as sun exposure and soil, rather than choosing by appearance alone. A well-matched plant can support a cohesive bed without excessive upkeep.
Then consider the maintenance each area will need. Drought-tolerant plants can reduce care requirements, while permeable pavers and synthetic turf are other options associated with lower landscape maintenance costs. Compare these choices with your preferred look and how you’ll use the site. The right combination depends on where people walk, gather, and access planting beds.
Prioritize Entries and Planting
Give the front entry a clear place in the layout, since its path, planting, and lighting work together. Start by mapping the route from the walkway to the door. Then position planting beds to complement that route without obstructing it. This clarifies the area to landscape and keeps entry improvements connected to the broader plan.
Choose the planting scope after defining the entry’s hardscape and infrastructure. For example, coordinate bed edges with the walkway and account for irrigation before installing plants. If the full entry plan doesn’t fit the current budget, complete the essential route and reserve adjacent planting for a later phase. Keep the overall layout consistent across both phases.
Plan a coordinated landscape layout around your site’s hardscape, infrastructure, and planting priorities.
GTE Construction & Roofing: New Roofing & Installation
GTE Construction & Roofing provides New Roofing & Installation for homeowners planning roofing work alongside broader home projects. If your landscape plan has clarified your priorities but your home also needs roofing attention, GTE can address that separate need. Roofing Repair is another option for existing roof concerns.
For interior projects, GTE also offers Kitchen Remodeling and Bathroom Remodeling. These services may be relevant when you’re planning several distinct improvements, but they’re separate from landscape installation. Keep each project’s scope and budget clear so costs don’t become confused across different types of work.
If you’re ready to discuss a roofing or remodeling project, contact GTE Construction & Roofing or visit gte-construction.com.
Turn Your Landscape Plan Into a Clear Next Step
A thoughtful outdoor space begins with decisions suited to your property and how you want to use it. With a defined direction, budgeting for landscape installation becomes a way to shape a manageable project, rather than a list of features you must complete at once.
Before moving ahead, write down the result you want from the first phase. That could mean creating a more welcoming entry, making the yard easier to maintain, or preparing a comfortable place to gather. Use that goal to guide discussions about the design and work involved. GTE Construction & Roofing offers landscape and design for homeowners ready to develop a plan around their property and priorities.
If you’re also planning improvements elsewhere in your home, GTE offers New Roofing & Installation, Roofing Repair, and Kitchen Remodeling. Keep each project’s scope distinct so you can make decisions clearly.
Contact GTE Construction & Roofing to discuss your next home project and take a considered step toward the space you envision.
Frequently Asked Questions
How much does professional landscape installation cost in the U.S.?
A common U.S. benchmark is spending 5% to 10% of a home’s value on landscaping; some planning guidance recommends 10% to 20%. These figures are starting points, not project quotes. The actual scope depends on the yard’s size, site preparation, materials, labor, and features. A planting refresh and a project with extensive grading and hardscape have very different requirements.
What is the average landscaping installation cost per square foot?
There isn’t one useful per-square-foot figure for every landscape installation, because the scope behind that measurement varies. A basic planting area and a yard with grading, drainage, paths, and irrigation involve different work. To understand a per-square-foot estimate, compare the area measured and the tasks included. Project pricing depends on the site, selected materials, preparation, and labor, and is provided after a quote request.
What factors affect the cost of a landscape installation project?
Property conditions and design choices both shape the project total. A sloped yard may require grading, while poor drainage can affect planting beds and paved areas. Limited equipment access may also change how crews move materials. The type and quantity of plants, hardscape materials, and infrastructure matter too. A site evaluation can identify soil and drainage needs before construction planning is finalized.
How should I create a budget for a landscaping project?
Start with a written scope and divide it into design, site preparation, materials, installation, and future care. Rank essential work ahead of optional features, then compare estimates based on matching tasks. A disciplined approach to budgeting for landscape installation also keeps a reserve separate from planned purchases. Track revisions as the plan develops so you can see how each change affects project priorities and sequence.
How much do plants, trees, sod, mulch, and hardscaping materials cost?
Material costs vary with quantities, plant size, species, material quality, and delivery access. A mature tree, for example, differs from a small starter plant in purchase and handling needs. Hardscape choices also depend on the area being covered and the preparation required underneath. Project pricing depends on the selected materials, site access, quantities, and installation scope, and is provided after a quote request.
What are typical costs for landscape design, labor, grading, and site preparation?
These costs depend on the design’s complexity, labor requirements, and site conditions. Ask for design, grading, and preparation to appear as distinct estimate items, with each task clearly described. The project price depends on the property, scope, materials, and labor, and is provided after a quote request. This breakdown helps you identify whether a change affects design, groundwork, or installation.
How can I reduce landscaping costs without sacrificing quality?
Keep the layout cohesive, simplify material selections, and choose plants suited to local conditions. Native plants generally need less water, fertilizer, and care, while drought-tolerant planting can reduce maintenance demands. You can also phase optional features while planning the full layout first. Don’t reduce necessary drainage or grading work to fund decorative additions, since those foundations support the finished landscape’s performance.
Do landscaping projects require permits or utility checks in my area?
Requirements depend on local rules and the work planned, so they can differ between San Francisco, Sacramento, Alameda County, and Contra Costa County. The project scope matters: excavation, grading, retaining structures, and irrigation may raise different local considerations. Before digging, identify buried utility lines through the appropriate local process, and ask the local building department which requirements apply to your plans.